Walk routes are now planned, drawn and followed on this website. Everything you need is built in: draw the route on the map, write the directions that go with it, and follow it on your phone on the day.
The OS Maps app is no longer needed for group walks, and you do not need an OS Maps subscription of your own. Nothing described below asks you to leave the site.
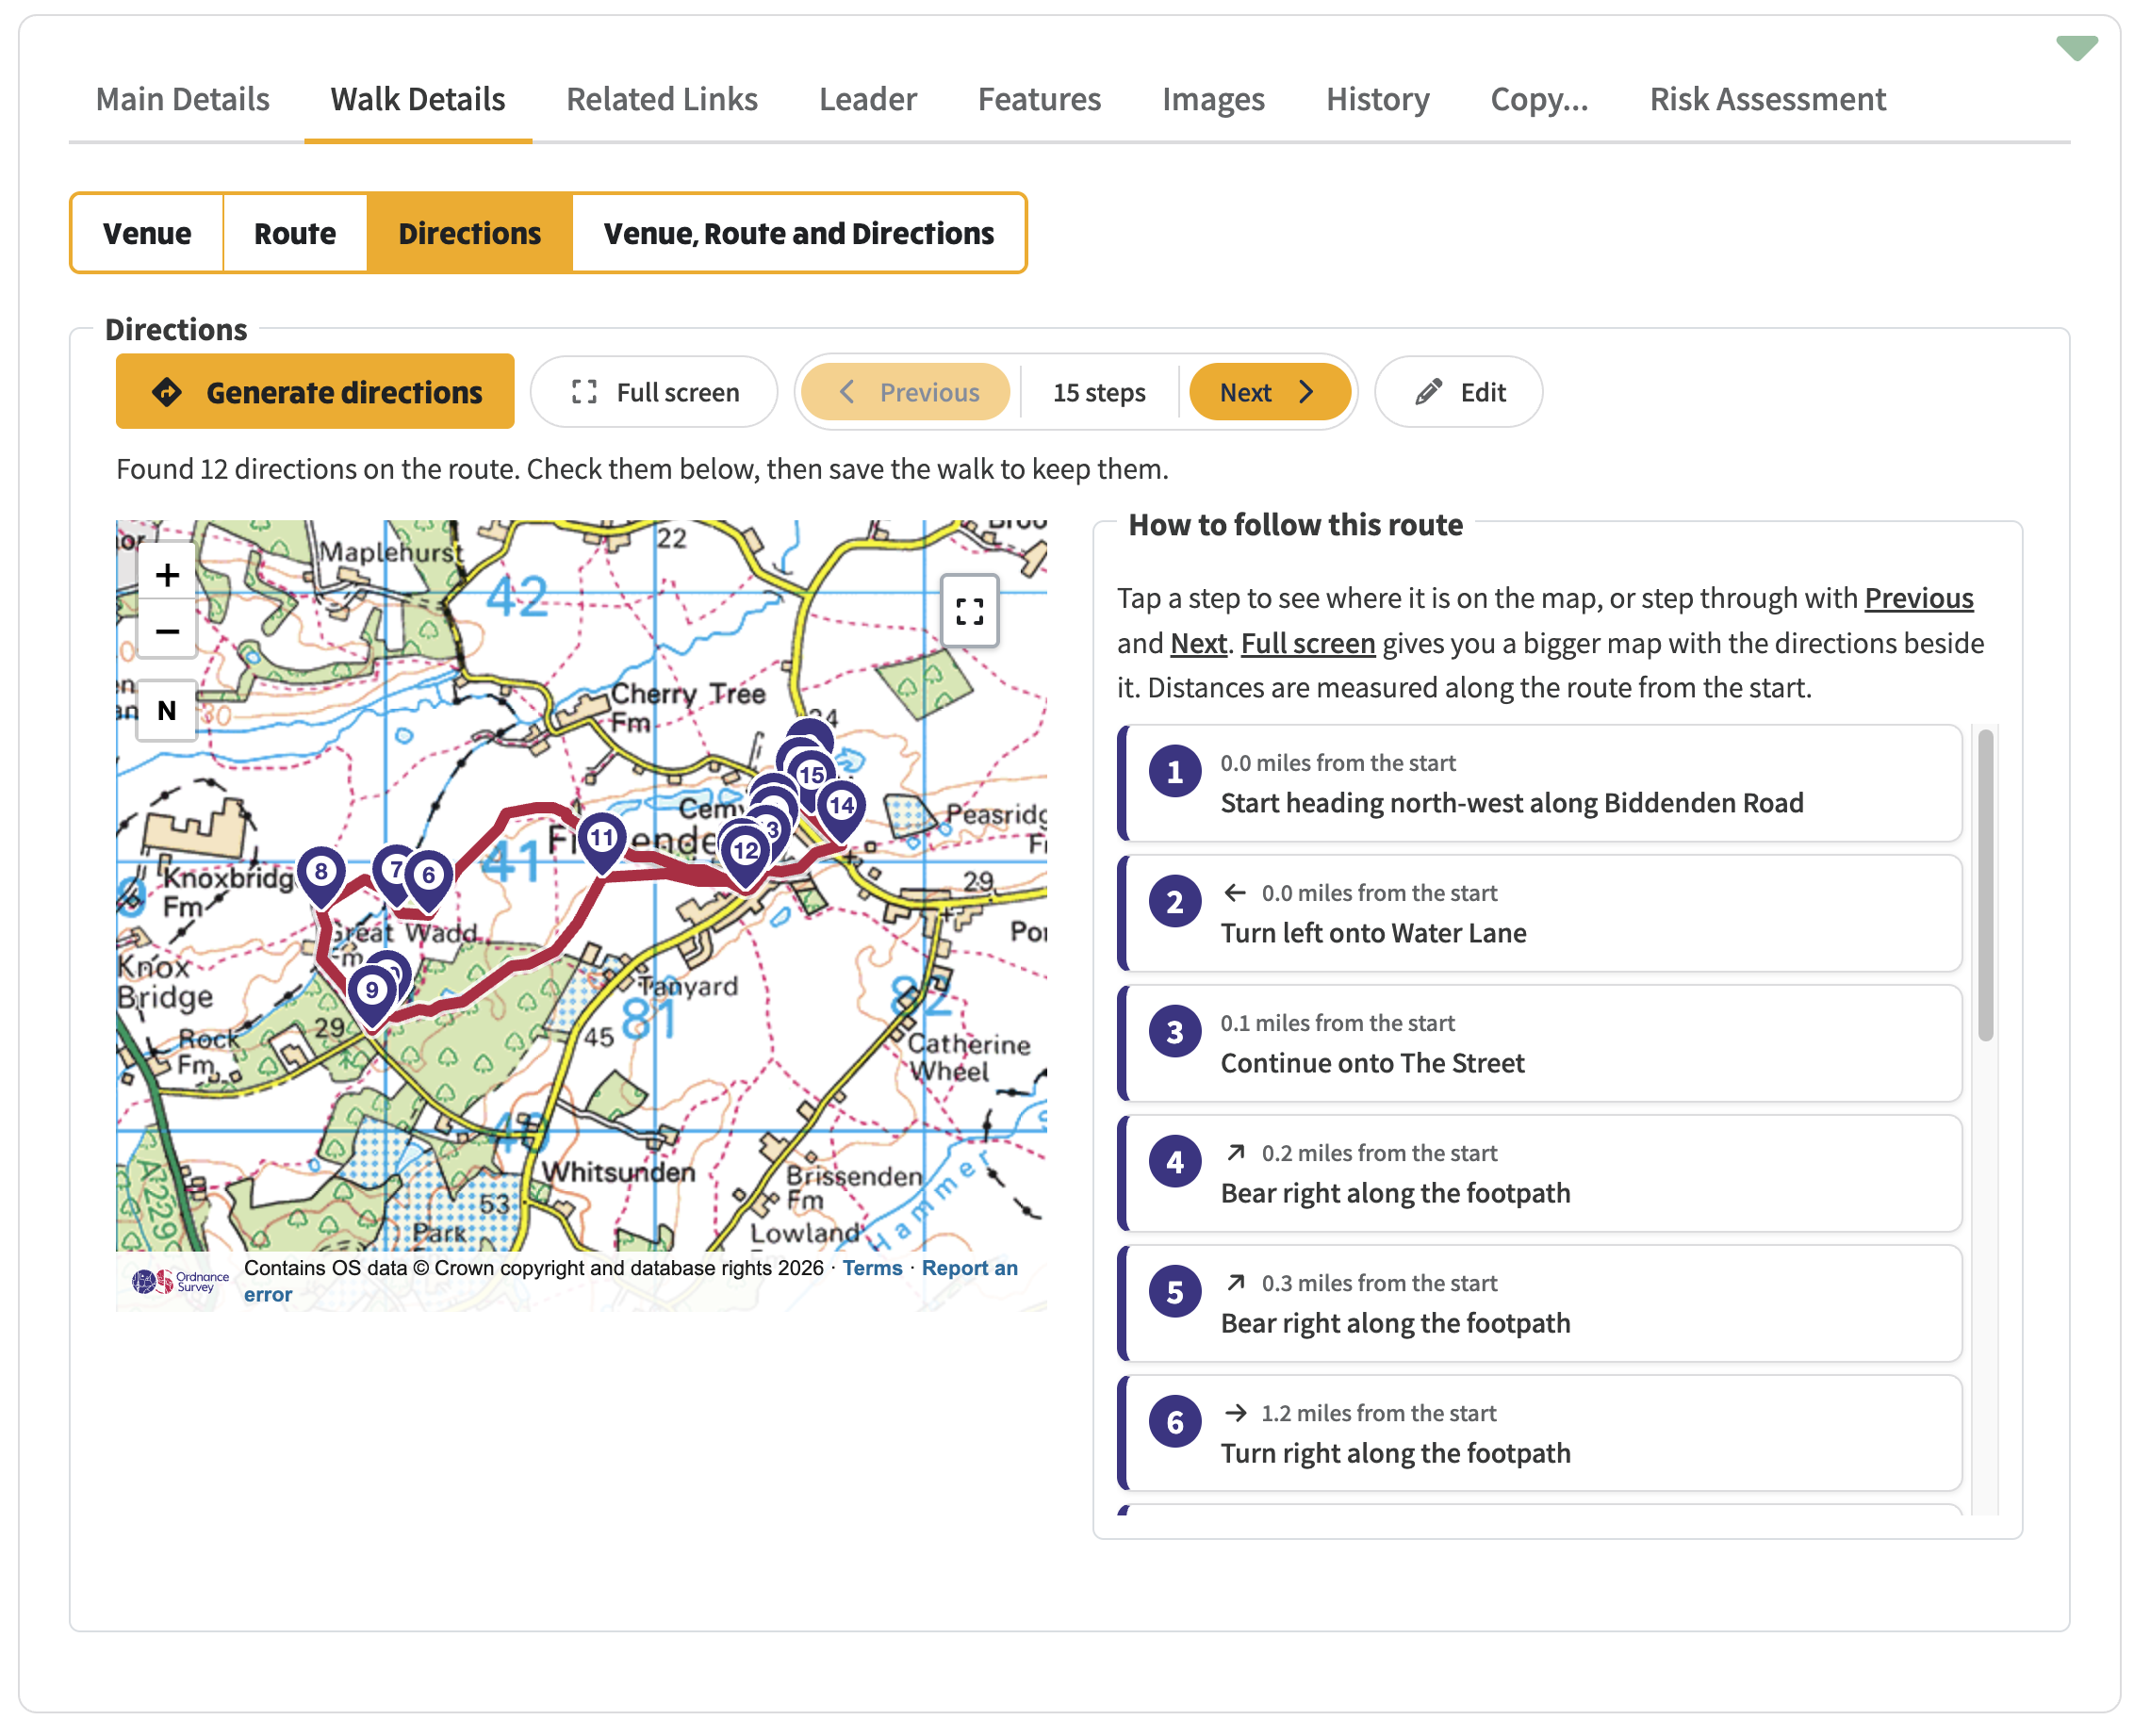
Directions generated from a route, with a numbered pin on the map for every step.
Open the walk and press Edit, then go to the Walk Details tab and choose Route. Drawing is available to walk leaders and admins, so log in first if you have not already.
Under GPX Route, press Record or edit. The map opens with the route toolbar along the bottom, and from there:
Zoom in as far as you need while you work. Clicking along the field paths and tracks gives a much more accurate distance than clicking a rough shape, and the distance is worked out for you as you go.
If you already have a GPX file for the walk, Upload New GPX on the same panel attaches it, and Fill details from route reads the distance, ascent and start point straight out of it.
More about route editing: Routes and walk directions improvements and clearing a route, and dragging the start pin.
A route on its own is a line on a map. The directions are what make it easy to follow on the day, for you and for anyone who takes the walk on after you.
Still on the Walk Details tab, choose Directions and press Generate directions. That reads the shape of the route, finds every turn, and names the roads and paths where OpenStreetMap knows them. You get a numbered pin on the map for each one and the list beside it.
Every generated direction is a draft, so go through them:
Save the walk when you are done, or the directions are not kept.
More about directions: the Directions tab in the walk editor and directions spread properly across the steps.
If a route already exists in the group's OS Maps account, it does not need to be redrawn. On the walk's Related Links tab, Import from OS Maps brings the route across and attaches it to the walk, and the progress of the import is shown while it runs.
Admins can also work through the whole list in one go from Walks admin, under OS Maps Routes: load the routes from the account, search or filter the list, tick the ones wanted and convert them to GPX. Routes that have already been imported stay marked, so it is clear what is left to do.
The connection to OS Maps is handled by the website itself, so there is nothing to set up and nothing to log into.
More about importing: importing OS Maps routes as GPX and the OS Maps routes page.
On the walk page, press Follow this route. The map opens full screen with the directions to hand, and a pink arrow shows where you are.
You will see straight away if you have wandered off the line, which is usually within a hundred feet or so, and you can correct it before anyone else notices.
Full screen is not offered on a phone, because Follow this route already gives you the whole screen. On a desktop you will still see it on the route map.
Open Maps while following to change how things look and behave:
If something looks wrong with a route, Report an error on the follow screen sends it to us.
More about following: following on a phone, and choosing the pointer size.
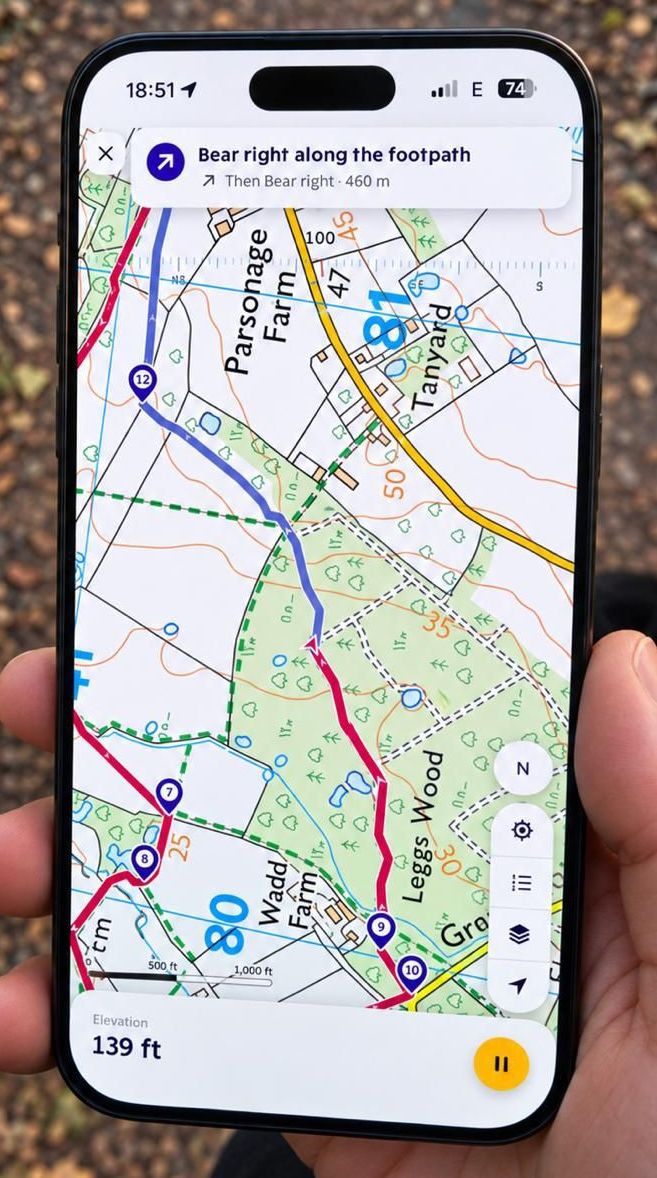
Following a route on a phone: the current step at the top, numbered step pins along the way, and your position on the pink line.
Navigating for a whole walk is hard on a battery, and a phone that dies at lunchtime is no use to anyone. Put a power bank and a charging cable in your rucksack and plug in when the battery starts dropping. Any of the usual power banks will give you several full charges before needing a recharge themselves.
It is still worth carrying a paper map and a compass, and knowing how to use them, for the day the phone gets wet or dropped.